What NOT To Do When Using Interactive Student Notebooks
Inside: Advice for teaching with interactive student notebooks.
My first year using interactive student notebooks, I jumped in on a whim. I liked the idea of student ownership: that the students would physically put together a record of their learning. They could put their personal style into this amazing portfolio of all we did.
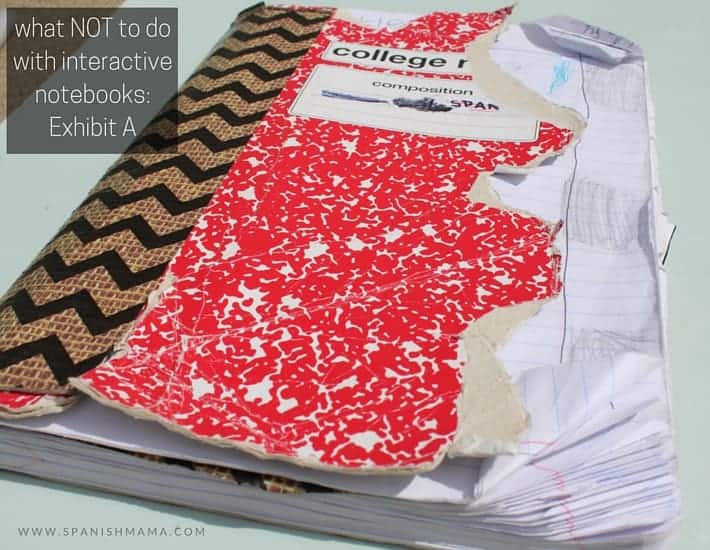
Well, here’s Exhibit A of how that turned out, from an 8th-grade boy:
It really was his personal style; it wasn’t what I’d been picturing.
Like most good things, interactive student notebooks can be great. But they require thought and planning to be done well. Now that I have a page devoted exclusively to lovely images of interactive notebooks for my Spanish I class, I’ll give you a look into The Year I Didn’t Plan Well. It’s kind’ve embarrassing, but it’s for a good cause: to help YOU!
Here’s my advice on what not to do with interactive student notebooks. (Update: don’t miss my posts on Getting Started with Spanish Interactive Notebooks, and 5 Myths About Interactive Notebooks!)
1. DON’T BE UNREALISTIC.
I started these the same year I had a baby at home, no planning period, no Spanish textbook, and too many preps. I taught 3 days a week then, so my planning period was me trying to type and grade on a Wednesday morning, while my kids played in the toilet or tried to sit on my head.
I’m glad I tried them out– even though they weren’t perfect, we enjoyed them. Just be aware that you will only attain all those beautiful Pinterest-y notebooks with careful planning. You may want to start with just one subject or level.
2. DON’T EXPECT A PRINTABLE OR FOLDABLE ON EVERY PAGE.
Despite my grand ideas, I quickly realized that interactive means:the student is connecting with the page in a meaningful way. Not: this paper flips up, and is therefore meaningful. It helps when work is beautiful and organized, but the main goal is meaningful and useful. Something just writing on the page is the most efficient and useful route.
Also, develop some “go-to” outlines for when you’re not using a printable/foldable, such as Cornell notes. Or have some graphic organizers you can project onto the board for students to copy.
3. DON’T THINK THAT PRINTABLES/FOLDABLES HAVE TO BE FANCY.
It can be something really simple like a strip of keywords and questions, glued in and then responded to. Efficient, sensible, and just enough structure.
4. DON’T USE REGULAR GLUE. GLUE STICKS ARE WAY BETTER.
Regular glue was a horrible mess! I really thought that middle schoolers / high schoolers might have a handle on the whole “a little dab’ll do ya’” refrain, but apparently not. It also takes a long time to dry, which is annoying if they need to go back and write something in.
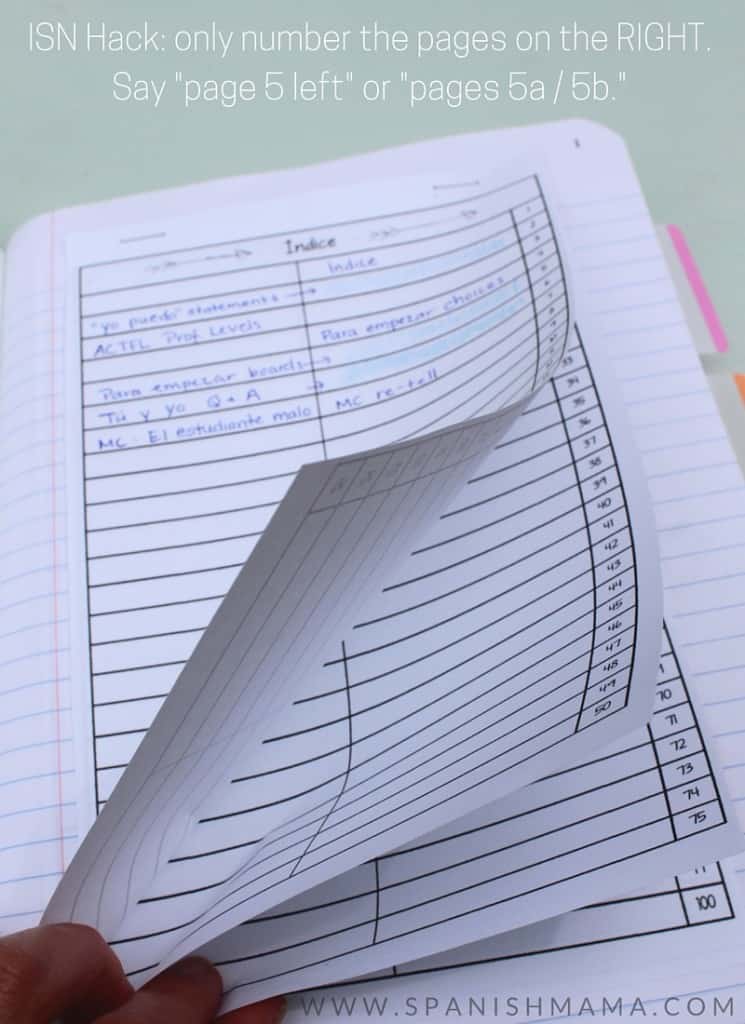
5. DON’T NUMBER EVERY. SINGLE. PAGE. JUST NUMBER THE ONES ON THE RIGHT.
Overall, the students really liked our interactive notebooks. But The Day We Numbered All 200 Pages was a bad day. It’s quite hard to number them correctly without skipping one and only realizing it 20 pages later. It’s much easier to stay on one side of the page and refer to the right and left side (good practice for derecha and izquierda!). One title will often work for both sides anyway.
To buy my bilingual Table of Contents / Índice, click here!
5. DON’T FORGET ABOUT THE TABLE OF CONTENTS. OR FORGET ABOUT IT ENTIRELY.
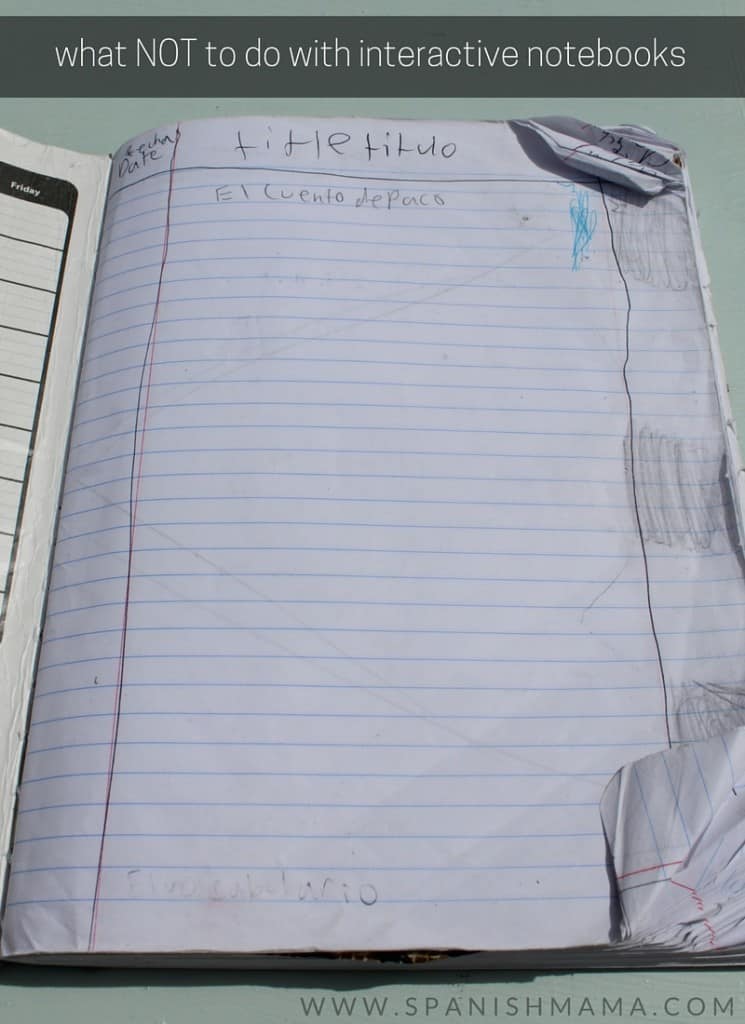
As you can see in the picture below, my 8th grader wrote exactly one title: El cuento de Paco.
Some of my students wrote every title page religiously, and some didn’t. It was my fault because I wasn’t enforcing/remembering the whole table of contents thing. I also had somehow lost track in every class of what page things were supposed to be on. Usually one responsible student would ask for the title and page number, and I would shoot back, “Whatever’s the next page!” I’m not sure that it truly matters, but for more Type-A teachers it might.
OR, if you know you won’t keep up with a table of contents, just go chronologically.
The root cause was not establishing a routine for our notebooks, and not staying a step ahead in my “Master Teacher Versions.” (Hah, hah. Those poor notebooks got abandoned by October, I think.) Which brings me to my next point…
6. DO MAKE A MASTER TEACHER NOTEBOOK FOR EACH SUBJECT/LEVEL YOU ARE DOING.
I was so overwhelmed I didn’t do this, but it really would have helped me. You need to think very specifically what you want each page to look like, because it’s amazing how students can misinterpret an overgeneralized explanation of something you think is fairly obvious. My goal is not to make a notebook of cute and clever worksheets, or a student-made textbook of drills. I want it to be thoughtful, and creative solution for organizing and using what we learn. A well-done interactive notebook will make learning more efficient.
And that, my friends, takes some thinking ahead.
Lastly,
7. DON’T EXPECT INTERACTIVE STUDENT NOTEBOOKS TO MAKE OR BREAK YOUR TEACHING.
I love them. They make sense to me. But they’re just a tool, in the end.
And my 8th grader with the torn-up notebook above? By the end of an informal 6-8th grade Spanish elective, he and the others were reading Piratas del Caribe. He had some of the best comprehension out of the class, and could give amazingly thoughtful answers. I’ll take that over a beautiful notebook, any day.
Did I miss anything? What’s you best advice for interactive notebooks, or what not to do with interactive notebooks?
Like it? Pin it!





This was also my first year using notebooks, and I’m frankly relieved that I’m not the only one who had these struggles! A colleague had a good idea regarding the table of contents. She simply used a sheet of chart paper to post a large version of the table of contents. Each lesson, she’d start by filling in the new title. Those students who fell behind had an easy reference to get caught up, and she could then avoid saying, “Whatever page is next.” I have also heard of teachers using tape rather than glue or glue sticks. Expensive, but possibly worth it.
I love the idea of the chart paper! Will have to try that one this year. So glad to hear from you!
At our local teacher store, they have a poster that looks like a blank sheet of notebook paper. I purchased one of those and had it laminated. I use it for a table of contents posted on the wall. I write on it with wet erase markers, that way it is semi-permanent until I clean it off. It works great!
Thanks for the awesome post!! This is my first year teaching and trying the interactive notebook in the gifted class grades 3-5. I’m glad to know about these pitfalls!! My plan is to not pre-number pages, but have the table of contents as “order of” in the notebook to be a portfolio of our work. I like the idea of questions / starters in a strip rather than gluing in a whole graphic organizer for our mini-topics we will work on. My plan was to use the right side as the topic discussion and the left side as our personal connection / expansion (so your side b and a), I may turn that into input on left (topic) and personal connection / expansion on right as the output (I saw this on another blog). Anyway, thanks for the words of wisdom and I’ll see how it goes!! 🙂
Who is the author/publisher of the piratas del caribe that you use?
1 – YES!!! Everything you just said, I went through last year. Year 2 is better, but I’m still improving. Also: When something doesn’t work, create a new file/copy right then. Don’t
just leave yourself a sticky note in your plans… you WILL forget
between now and next year, and will remember halfway though your failed
foldable.
2 – look up Glue sponges. I’d link the blog where I found them, but… school firewalls. I’ll try to remember to come back from home. They have been a wonderful balance of glue sticks vs liquid glue for my classroom.
3 – I’m making (and laminating) board sized versions of my frequently used foldables from chart paper or bulletin board paper. I use my projector to trace the shapes that I need in the sizes that fit the laminator at our school. That way, I can complete a full size version in dry erase marker as my students are creating theirs. (More than once I have “redneck laminated” with packing tape during my first block when I’ve forgotten to do this ahead of time. Also – I’m open for suggestions on what to call that process besides “redneck laminating.”)
4 – Crayola dry erase crayons and colored pencils also hold up to simple abuse, and are generally cheaper than wet-erase markers for things you want to be semi-permanent on your boards. (Although the colored pencils are really too fine for anything I want students to see, rather than just me.)
Have ya’ll considered using posit tabs or making dividers out of ducttape for younger users (think k-3) instead of a table of contents and numbered pages. If color coded they are an excellent visual table of contents as well as reference guide. I wish I had a demo pic but I hope ya’ll get the idea. It worked wonders for my homeschool group, 🙂
I had the same issue with the Table of Contents. I think it also depends on the level of students you teach. My students tend to struggle academically (and most of them had organization issues to boot) so I will be setting up table of content chapter dividers for them to staple or glue in. This also help if they are absent and need to know what sections they are missing.
Keeping a master copy is a must, especially if you have different classes with some content overlap (ie – I teach Algebra 1 and Algebra 2). It also helps with teachers who want to jump on board if they can see your master copy – I make new notebooks each year.
In the end, flexibility is the key. It is a great tool and many of my students really loved these!